Hello OrbTk!

Now that you’ve installed the needed building blocks, let’s write your first
OrbTk program. It’s traditional when learning a new language to write a little
program that outputs the text Hello, world!. So we’ll do the same here. We
create a minimal app, that creates a window, position this window at the given
coordinate of your screen. The text will be placed in the center of this
widget.
Note: This book assumes basic familiarity with the command line. Rust makes no specific demands about your editing or tooling or where your code lives, so if you prefer to use an integrated development environment (IDE) instead of the command line, feel free to use your favorite IDE. Many IDEs now have some degree of Rust support; check the IDEs documentation for details. Recently, the Rust team has been focusing on enabling great IDE support, and progress has been made rapidly on that front!
Creating a Project Directory
You’ll start by making a directory to store your OrbTk code. It doesn’t matter to Rust and OrbTk where your code lives, but for the exercises and projects in this book, we suggest making a projects directory in your home directory and keeping all your projects there.
Open a terminal and enter the following commands to make up the projects structure.
For Linux, BSD, macOS, and Power-Shell on Windows:
$ mkdir -p ~/orbtk-book/projects
$ cd ~/orbtk/projects
For Windows CMD:
> mkdir "%USERPROFILE%\orbtk-book"
> cd /d "%USERPROFILE%\orbtk-book"
> mkdir projects
> cd projects
Writing and Running a OrbTk Application
Next, we make a new project using Cargo. With its .toml file we allow Rust to declare the various dependencies and metadata. That ensures that you’ll always get a repeatable output of the build.
Go ahead like so:
$ cargo new orbtk_hello
$ cd orbtk_hello
The first command, cargo new, takes the name of the project
(“orbtk_hello”) as the first argument. The second command changes to
the new project’s directory.
Look at the generated Cargo.toml file:
Filename: Cargo.toml
[package]
name = "orbtk_hello_example"
version = "0.1.0"
authors = ["Your Name <you@example.com>"]
edition = "2018"

# See more keys and their definitions at https://doc.rust-lang.org/cargo/reference/manifest.html

[dependencies]
Listing 1-1: Default metadata “orbtk_hello”
With cargo new, a default project structure is created. Maybe the
author information is already exchanged if Cargo could obtain a definition
from your environment. Cargo also generated source code for a “Hello, world!”
program. Let’s Check out the corresponding src/main.rs file:
Filename: src/main.rs
fn main() {
    println!("Hello, world!");
}
Listing 1-2: Default source file “main.rs”
No need to compile that stage with cargo run, since we are going to
exchange the project metadata, as well as the orbtk source code right
away.
Update Cargo.toml
First reopen the Cargo.toml file and enter the Code in Listing 1-1 into Cargo.toml
Filename: Cargo.toml
[package]
name = "orbtk_hello"
version = "0.3.1-alpha4"
authors = [
	"Florian Blasius <flovanpt@posteo.de>",
	"Ralf Zerres <ralf.zerres.de@gmail.com>",
]
description = "The Orbital Widget Toolkit - Training project"
documentation = "https://docs.rs/orbtk"
repository = "https://github.com/redox-os/orbtk"
readme = "README.md"
license = "MIT"
keywords = [
	"orbital",
	"widget",
	"ui",
]
edition = "2018"

[profile.dev]
opt-level = 1

[dependencies]
orbtk = { git = "https://github.com/redox-os/orbtk.git", branch = "develop" }
#orbtk = { path = "../../../orbtk", branch="next" }

[[bin]]
name = "orbtk_hello"
path = "src/main.rs"
Listing 1-1: Project metadata “orbtk_hello”
You may wonder, why the name property inside the Cargo.toml is
formatted like hello_orbtk.
name = "orbtk_hello"
It is a good habit to follow rusts
naming convention, that encourages you to use snake_case
naming. While expanding the OrbTk example sources, we will keep
the grouping prefix orbtk. That way we end up to call our first target
binary orbtk_hello.
Update main.rs
All of the OrbTk specific code that is needed to build our first example “Hello OrbTk!” is shown in Listing 1-2. It goes to src/main.rs.
Filename: src/main.rs
use orbtk::prelude::*;

fn main() {
    // use this only if you want to run it as web application.
    orbtk::initialize();

    Application::new()
        .window(|ctx| {
            Window::new()
                .title("OrbTk-Book - Chapter 1.2")
                .position((100.0, 100.0))
                .size(420.0, 140.0)
                .child(
                    TextBlock::new()
                        .font_size(28)
                        .h_align("center")
                        .text("Hey OrbTk!")
                        .v_align("center")
                        .build(ctx)
                )
                .build(ctx)
        })
        .run();
}
Listing 1-2: Code that creates a Window and prints “Hey OrbTk!”
Save the file and go back to your terminal window. Enter the following commands to compile and run the file:
$ cargo run --release orbtk_hello
Note: Perhaps the OS requires you to install the development version of SDL2 via the distribution package-manager (e.g. for Ubuntu: libsdl2-dev).
Regardless of your operating system, a window should be placed on the screen
that prints the string Hey OrbTk! in its center.
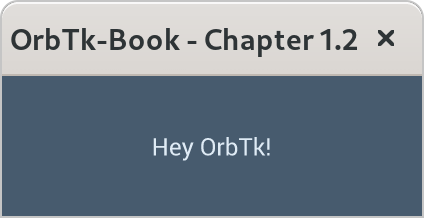
Image 1-2: Application window and Hey OrbTk
If something is preventing to position the window, refer back to the “Troubleshooting” part of the Installation section for ways to get help.
If your enjoy the rendered output of your Hey OrbTk! app,
congratulations! You’ve written your first OrbTk application.
That makes you a OrbTk programmer — welcome!
Anatomy of an OrbTk Application
Let’s have a closer look at the code structure of this first “Hey OrbTk!” application.
For now it should be sufficient to disenchant the first puzzle pieces. If you like to understand the structure in a more generic way, in Chapter Workspace we are going to provide the details.
use orbtk::prelude::*;

fn main() {
    // use this only if you want to run it as web application.
    orbtk::initialize();

    Application::new()
        .window(|ctx| {
            Window::new()
                .title("OrbTk-Book - Chapter 1.2")
                .position((100.0, 100.0))
                .size(420.0, 140.0)
                .child(
                    TextBlock::new()
                        .font_size(28)
                        .h_align("center")
                        .text("Hey OrbTk!")
                        .v_align("center")
                        .build(ctx)
                )
                .build(ctx)
        })
        .run();
}
The first line is introducing a use declaration. A use declaration is used to shorten the path required to refer to rust module items. The prelude is a convenient way to a list of things, that rust will automatically import to you program. Here, we bind the path orbtk::prelude. All default items defined in this path (referenced with ::) are now accessible in your source using their shorthand name. No need to type in their common prefix (orbtk::prelude::)
use orbtk::prelude::*;

fn main() {
    // use this only if you want to run it as web application.
    orbtk::initialize();

    Application::new()
        .window(|ctx| {
            Window::new()
                .title("OrbTk-Book - Chapter 1.2")
                .position((100.0, 100.0))
                .size(420.0, 140.0)
                .child(
                    TextBlock::new()
                        .font_size(28)
                        .h_align("center")
                        .text("Hey OrbTk!")
                        .v_align("center")
                        .build(ctx)
                )
                .build(ctx)
        })
        .run();
}
the third line define a function in Rust. The main function is special: it is
always the first code that runs in every executable Rust program. The first
line declares a function named main that has no parameters and returns
nothing. If there were parameters, they would go inside the parentheses, ().
Also, note that the function body is wrapped in curly brackets, {}. Rust
requires these around all function bodies. It’s good style to place the opening
curly bracket on the same line as the function declaration, adding one space in
between.
An automatic formatter tool called rustfmt will help you to stick to a
standard style across Rust projects. OrbTk is following this guidance.
rustfmt will format your code in a particular style. Depending on the version
of your rust toolchain, it is probably already installed on your computer!
Check the online documentation for more details.
Inside the main function is the following code:
use orbtk::prelude::*;

fn main() {
    // use this only if you want to run it as web application.
    orbtk::initialize();

    Application::new()
        .window(|ctx| {
            Window::new()
                .title("OrbTk-Book - Chapter 1.2")
                .position((100.0, 100.0))
                .size(420.0, 140.0)
                .child(
                    TextBlock::new()
                        .font_size(28)
                        .h_align("center")
                        .text("Hey OrbTk!")
                        .v_align("center")
                        .build(ctx)
                )
                .build(ctx)
        })
        .run();
}
Here are some important details to notice.
- First, Rust style is to indent with four spaces, not a tab.
- Second, the method
orbkt::initializedoes all the hard work to initialize the orbtk environment.
use orbtk::prelude::*;

fn main() {
    // use this only if you want to run it as web application.
    orbtk::initialize();

    Application::new()
        .window(|ctx| {
            Window::new()
                .title("OrbTk-Book - Chapter 1.2")
                .position((100.0, 100.0))
                .size(420.0, 140.0)
                .child(
                    TextBlock::new()
                        .font_size(28)
                        .h_align("center")
                        .text("Hey OrbTk!")
                        .v_align("center")
                        .build(ctx)
                )
                .build(ctx)
        })
        .run();
}
- Third, the method
Application::newcreates a new entity in the entity component system (DECS). DECS is an OrbTk dependency that will create and organize all OrbTk entities. If OrbTk methods change attributes to the widget elements, the corresponding DECS object will store this attributes as components to the given entity.
We’ll discuss OrbTk macros and methods in more detail in Chapter <WIP: chapter>.
For now, you just need to know that using a ::new() means that you’re calling
the creation method of a given widget (here: Application).
Let’s explain the next lines:
use orbtk::prelude::*;

fn main() {
    // use this only if you want to run it as web application.
    orbtk::initialize();

    Application::new()
        .window(|ctx| {
            Window::new()
                .title("OrbTk-Book - Chapter 1.2")
                .position((100.0, 100.0))
                .size(420.0, 140.0)
                .child(
                    TextBlock::new()
                        .font_size(28)
                        .h_align("center")
                        .text("Hey OrbTk!")
                        .v_align("center")
                        .build(ctx)
                )
                .build(ctx)
        })
        .run();
}
Inside the Application method, we pipe in further instructions. Please notice
the important details:
- First, Rust style is to indent with another four spaces, not a tab.
- Second, The piping is encoded using a
dotfollowed by a new method name (herewindow). - Third, the
windowsmethod takes a Rust closure as its argument.
If you are not familiar with the concept of
closures,
go ahead and consult the Rust book reference for a deep dive. For now,
you just need to know that a closure can be used as a language
shortcut for a function. When the closure |ctx| {} is executed, the
result will be captured inside a return variable (ctx). The curly
braces define the body, with the code that is executed inside the
closure.
Let’s examine this body code of our closure:
- First, we call a method to create a new window entity.
(
Windows::new). - Second, we define attributes attached to this entity (
title,position,size). - Third, inside the defined windows, we create a new child entity
(
child).
use orbtk::prelude::*;

fn main() {
    // use this only if you want to run it as web application.
    orbtk::initialize();

    Application::new()
        .window(|ctx| {
            Window::new()
                .title("OrbTk-Book - Chapter 1.2")
                .position((100.0, 100.0))
                .size(420.0, 140.0)
                .child(
                    TextBlock::new()
                        .font_size(28)
                        .h_align("center")
                        .text("Hey OrbTk!")
                        .v_align("center")
                        .build(ctx)
                )
                .build(ctx)
        })
        .run();
}
- Forth, the child method takes arguments. We create a new text block
entity (
Textblock::new). The text block is extended with the attributes (text,h_align,v_align). The text attribute takes the desired string. Its positioning is controlled with the attribution of the horizontal and vertical alignment. By choosing “center”, we do advise the renderer to place the entity centered within its parent entity, which is the window.
use orbtk::prelude::*;

fn main() {
    // use this only if you want to run it as web application.
    orbtk::initialize();

    Application::new()
        .window(|ctx| {
            Window::new()
                .title("OrbTk-Book - Chapter 1.2")
                .position((100.0, 100.0))
                .size(420.0, 140.0)
                .child(
                    TextBlock::new()
                        .font_size(28)
                        .h_align("center")
                        .text("Hey OrbTk!")
                        .v_align("center")
                        .build(ctx)
                )
                .build(ctx)
        })
        .run();
}
OrbTk is as lazy as possible. We need to call the build method (build(ctx)),
that will instantiate our methods and let the renderer do its work.
use orbtk::prelude::*;

fn main() {
    // use this only if you want to run it as web application.
    orbtk::initialize();

    Application::new()
        .window(|ctx| {
            Window::new()
                .title("OrbTk-Book - Chapter 1.2")
                .position((100.0, 100.0))
                .size(420.0, 140.0)
                .child(
                    TextBlock::new()
                        .font_size(28)
                        .h_align("center")
                        .text("Hey OrbTk!")
                        .v_align("center")
                        .build(ctx)
                )
                .build(ctx)
        })
        .run();
}
With the last statement, we finally call the method that will activate the
Application and draw the Widget on our screen (run).
Most lines of Rust code are finalized with a semicolon (;), to indicates that this
expression is finished and the next one is ready to begin.
Compiling and Running Are Separate Steps
Before running an OrbTk application, you must compile its source code. A typical OrbTk project will generate the executable binary code using cargo and place the result in the target subfolder of the project.
Profiles may be used to configure compiler options such as optimization levels
and debug settings. By default the dev or test profiles are used. If the
--release flag is given, then the release or bench profiles are used.
$ cargo build --release --bin orbtk_hello.rs
$ ../target/release/hello_orbtk
On Windows, you need to use backslash as a path delimiter:
> cargo build --release --bin orbtk-hello.rs
> ..\target\release\orbtk_hello.exe
If you like to get debug feedback you can call the build process like this
$ cargo build --features debug --bin hello_orbtk.rs